Thursday, November 7, 2013

DIY Art

SO...How was everybody's Halloweeeeen?

We had our yearly bash and I did a lot of little DIY crafts for the big event.  Tons of decorating!  Which also meant tons to clean up and take down for next year.  A few Instagrams from the night just for fun:


(Top Left:DIY Creepy No-Flame Candles // Top Right:I was a kitty for Halloween.  Look at my cool contacts! // Bottom Left:My husband the Slender man and pirate wench sister // Bottom Right:Bloody laundry)


This was the most effort that I have put into the decor so far, but since the moment has passed I'll be storing all those ideas (and more) away to share with you before next year's Halloween season!  How's that for a cliff hanger?

Once I got all the creepy blood-spatters off the walls I realized that they were looking all too plain.  I had a few things up, but they were more "just for now" fixes I threw up a couple years ago to spruce up the walls until I came up with something truly worthy.  BUT, you know how it is and that stuff just gets put on the back burner sometimes.

I was so sick of looking at the tired layout and decided to bring it all down and start from scratch!  The first step to doing this was to remove the dusty floral fabric that I had wrapped over a white canvas and reuse the canvas.  I was in a really hurry to get rid of this look so I only have a crappy photo of how it was looking before.


You can get a basic canvas in all sorts of sizes from any Joanns or even Wal-Mart: but if you want to get super creative with what you have on hand I would suggest using the top off of a shoe box (or even a scrap of plywood from the garage..?)

Then I surfed the web for some DIY art inspiration including my 2 favorite inspirational resources: Pinterest and Houzz.  I probably found way too much inspiration, but I knew I wanted something light/bright and graphic.  I finally narrowed it down to this idea from The Embellished Nest!  Her take on this diy idea is gorgeous, but for my canvas I was looking to go super simple.  I followed her tutorial for measuring and placing my painter's tape.

Then I did my own thing by just using a gold spray paint that I already had and spraying nice and evenly across my taped canvas.  I laid on the gold very heavily toward the bottom and just misted it onto the top for a cool ombre effect.

Here's my result:


Not the greatest pictures.  It's so gloomy out today!


For free.99, I'm really happy with how this turned out and I can't wait to show off the new layout once it's actually on the walls.  This is one of those beautiful ideas that you can twist and bend to your will, I love it!  You could do any pattern with the tape, switch up paint colors, try out different tools (paintbrushes, foam brushes, your hands, makeup sponges...)  Go crazy with it.

Sometimes you just need to take a step back and tear it all down!  A fresh start is never a bad thing.  When you're stuck in a decorating rut, try it!


betty signature

Wednesday, October 23, 2013

DIY Fall Decor

One of the things that I enjoy most about DIY'ing is repurposing the old and unused into something new.  This can mean a major upgrade, where the original find is barely recognizable.

Like this amazing transformation by Kim at Reposhture Studio.  An old headboard and footboard turned adorable and cozy reading bench.  I can definitely see myself curling up on that baby!  Putting this on my To-Do list...


You can also make the most subtle changes and make a world of difference.  Maybe you don't change the item much at all, but find a new use for it in an unexpected way.  That's what I did with my bamboo steamer!

It was just sitting on my counter top collecting dust and taking up valuable counter space!  This is something I cannot afford to waste at my house.  I barely use the thing anyway.

I started brainstorming.  Looking at the steamer basket and admiring the chevron-like pattern of the lid made me think that this thing should be on display.  And I do have some very plain kitchen walls that I'm always scowling at...


I like this a lot more than I even imagined!  I just separated each layer and hung them with your average picture hanging nails.  I didn't measure or anything, just eyeballed it.

Here's a close-up of the lid.  I love the weaving on it.


I filled the two other pieces with some various fall leaves and a votive that I had on hand for a little visual appeal.


Threw in a little picture of Shauny & I in an antique frame for a personal touch.  It's been sitting in the same spot on the bookshelf for a long time so I figured I'd switch it up.


Plain wall progress so far...


It's getting there!  I love getting something from nothing.  What kind of things have you used or displayed around your home in an unexpected way?

Here are some links that I've been eyeing to a few great DIY fall crafts:


You can get super creative with this next idea.  Use whatever you have on hand.  Grab some twigs or branches from your own yard.  Use a cool mason jar or an old salsa jar that you've cleaned up and saved.  Perhaps fill it with dried beans or split peas.  The possibilities are endless!


Pop an old sweater sleeve over a vase you already have to give it a cozy fall vibe that'll tide you over through winter as well!


Are you done decorating for fall yet?  If not, try browsing your house before you hit up the stores!  Keeping an open mind and seeing your own everyday items in a new light may make for some interesting (and cheap) new decor.

Thanks for reading!


betty signature

Monday, October 21, 2013

Long Time, No Blog!

Okay, I've definitely been M.I.A. on the ol' blog.  My desktop, which is the computer that I mainly use, is still down.  I guess I'm just gonna have to get over it 'cause it may be down for a while.  I was going to try and wait it out, but I haven't blogged in far too long.  The desktop PC is the one I put ALL of my pictures onto and edits, etc.  Very annoying, but life must go on.

I'll get back into the swing of things with a quick fix that I did recently!

So here's the thing; when I come up with a solution to something around the house, it's more often a super cheap quick fix that works for now.  Then later on down the line when I'm looking for something to focus on, I can direct my attention back to it and come up with a more functional or appealing, long-term solution.

The benefit to this is that it gets taken care of for the time being, buying me more time to think of a permanent solution and not rushing into spending my cash money on something that I'm going to hate in two days.

For me, the best part of this strategy is that I normally come up with a great idea when I'm not trying so hard.  The more I over think a project, the more jumbled and rushed it turns out.

Take my jewelry storage for example.  I wanted to store my necklaces in a way that also put them on display.  I grabbed this random tie/belt hanger that I had laying around my room and hung it on my bedroom wall with a couple of push pins.  Yup.  Didn't even use nails.  That was a super temporary solution that was easily forgotten.  For 5 years.


Then, as fate would have it, I was forced to come up with something better last week when I found that FINALLY my necklaces had come crashing to the floor in a tangled mess. I really could've gotten around to that one a bit sooner, but I am a procrastinator.  Bless those push pins' little hearts for hanging in there for so long!


Luckily I do a lot of research on this sort of thing in my spare time...

*Cough*Pinterest*Cough*

I knew I wanted to display my necklaces in a way that wasn't expected and would pass more as decor than storage.  I remembered seeing some cool images of necklaces hanging from branches or animal skulls and such.


Pretty damn neat, but maybe a little...rustic for my taste.  Though I did have the perfect thing in mind.  Shiny faux taxidermy that I had eyed at TJ Maxx and couldn't wait to get my hands on anyway.  Perfect excuse!  But at only $12.99 I didn't really need an excuse.  I love cheap fixes.

So my jewelry area went from this:


To this:


My wall color looks weird and greeny in this last photo.  The top 2 are more true to the actual color.  I need to work on my photography skills, but super fun huh??  I screwed it in with an anchor and everything so I shouldn't have to worry about picking my necklaces up off the floor any time soon.


Sometimes it just takes a little (or a lot of) time before you settle on what works for you.  Your perfect nest doesn't happen overnight!  Baby steps, baby steps...

What do you guys do in these situations??  Are you the type that has to sit on a project for a while and get to the finished result in multiple stages?  Or do you have to get it done exactly the way you want it the first time around?

Thanks for lookin'!


betty signature

Monday, September 30, 2013

Gallery Wall Inspiration

My desktop computer decided to take the day off today.  We're all entitled to a little me-time, right?  So I'm working from my lap top today.  Sucks though because the desktop computer is the one that I use to upload all my photos onto and edit them.  We have that one set up with much more storage space.

I was going to reveal the new state of our home office/craft room today, but since that isn't panning out I'll share with you some great inspiration photos for the gallery wall that I am slowly building onto in there.

One of the major thoughts behind the whole thing is that I want it to strongly reflect Shaun's tastes as well as my love for, well...cohesive, eye-pleasing loveliness.  It is just a fact that my crap fills up a good 90% of the house.  Think of this as my attempt to even out the score.  Just a bit.

Shaun, if you're reading this that doesn't mean dirty socks on the floors and Nerf guns on the walls.

Commence inspirational photos!


This first one is from Caitlin of Desert Domicile and it's just great.  The things I love about it are the pops of color among the black and white and the use of not only framed pictures but the mirror, signs, and items like the keys and license plate.  She also gives a few a her tips on putting together your own gallery wall so check it out!


I'm in love with this one featured in Elle Decor!  Given, it is mainly due to the space itself with it's sloped ceiling and all, but still.  I do love how they filled up every inch of the wall.


This gallery wall, featured on Apartment Therapy, gives off a sense of symmetry that I know my obsessive tendencies will draw me towards in my own gallery.  It's got that eclectic, but not too eclectic vibe that I totally dig.


This wall done by Carmel over at Our Fifth House drew me in with the interesting items she included.  I love the hat and purses.  We have a couple of vintage hats of Shaun's that would be great for this.  And when he feels like wearing one, he can just grab it and go!


Feelin' that symmetry vibe...


This one uses all different sized and shaped frames to form one tight square.

I think this project is going to be a lot of trial and error.  I'm really going to have to go with my gut on this one.  This can be a hard thing to do for an obsessive perfectionist-type, but I'm willing to give it a shot.  I do love that "collected over time" style that is so hard for me to grasp sometimes.  I find myself just having to take a step back or let a project like this sit for a while before I continue on with it.

Are you a perfectionist or does eclectic styling come naturally to you?  Any tips?  Thanks for reading, you guys!  Until next post...


betty signature

Wednesday, September 25, 2013

Super Trendy Painted Bowls

I'm feeling really good about this painted bowl trend that I've been seeing all over everywhere.  I know you've been pinning them too!  There's no shame.


(1/2/3/4)

It got me really excited because I cannot tell you how many ugly and plain wooden bowl sets I have casually passed by in second hand stores.  As if they had no potential at all...pfffff.  So I went out and picked up one of these puppies for a whopping $1.99.


BEFORE:

Monday, September 23, 2013

Time to slow my roll.

I have been on all systems go lately.  Churning out ideas and projects.  Letting the excitement of completing them get to me before I have a chance to properly take notes, take pics, and blog.  I need to be stopped.  I'm like an out of control DIY monster, wreaking havoc on my house (and poor Shaun.)  

I'm not kidding, guys, there are power tools everywhere.  Pages torn out of HGTV magazines and paint swatches cover every table top.  Disconnected notes and ideas hurriedly scrawled onto chalkboard-painted surfaces in every room.  The madness.

I've decided that more organization is what I need; in my mind as well as my home.  So to balance out my "take action" side with a little thought, I'm going to start compiling a list of changes I'd like to make in each room of my house.  This will be my "To Do" list that I can continually update to keep track of my progress and organize my thoughts and ideas in one spot.

Let's start with my all time favorite room, The Kitchen:


Wednesday, September 11, 2013

Moving On...

Next stop, the living room.  


BEFORE:


You'll notice two similarities between the "before" and "after" pictures.  The coffee table is still kickin' it in the living room.  Mainly because it is one of the amazing lift up tables (a.k.a. our dinner table.)  The blue chair is still around too.  Though I must say I would do anything to get rid of that chair.  It was free.99 so what can I say? 

I created a monster.  Shaun is totally attached to this chair.

Me: I hate it, it's so not cute!
Him: It's comfortable!  I'm keeping it!

What is it with guys??  Cute can be comfortable too!  You just have to look around for the right piece!
Anyway, the couch was a hand-me-down also and I always found it too bulky looking and...tan.  The vinyl was awful mainly because the couch is my dog's spot.  He's a couch potato and there were little tears all over it in no time.  And besides looks, that was the heaviest couch I have EVER had to move and barely fits through our doorways.  Good riddance!

So pretty much just everything about this room was not working for me.

Monday, September 9, 2013

Once again, I need your help!

I have been taking my time and ever so patiently keeping my eyes open for the perfect mirror (or a mirror with perfect potential) to fill the empty space on the back wall of the front entry.


I wanted something large and decorative.  I had in mind something along these lines.  However the funny thing about plans is, say it with me everybody, they change!


I happened upon this sweet find at my local Restore.  Ya know what that little green sticker says?  $12!  Yup, pretty cool.  The only problem is I'm not sure what color to paint it.  I definitely want it to stand out.  There isn't a whole lot of color in this area yet.

I kind of had a nice dark blue in mind.  More navy?  More teal?  I can't decide!  Here are a few samples that I have my eye on...


Which do you like the best?  What color do you think would look the greatest with my persimmon ceiling??

And if you don't prefer any of them, give me your suggestion!  I love getting feedback from you guys!


betty signature

Monday, September 2, 2013

Simple Chair Re-upholstery.

Okay, so check out this chair.  I found it at the local antique store for $7.  It may not look awesome now, but I saw that frame and knew it was destined for something much greater...

BEFORE:

Monday, August 26, 2013

Kitchen Cart Remix

I'm really trying to keep on with the house tour, but I've been having way too much fun with little projects.  It's so hard not to finish them and post right away!  This one was a super simple little refresher for this kitchen cart.

I've had it for a while now, but I decided it needed an upgrade.  It's all part of my master plan: embracing color.  You'll probably notice I tend to lean towards black, white, gold, or some other neutral for everything.  It's been brought to my attention several times and now I'm trying to broaden my horizons and spice things up.


BEFORE:

Friday, August 23, 2013

We now interrupt your regularly scheduled House Tour post...

Let's take a break.  So, as we discussed previously, my dining room needs a lil' somethin' somethin'.  More color.  More decorative pillows on the church pew.  Really gotta do something about the 70s fabric that is yet to be removed from those chairs.  I chose to start with a very popular accessory: The Framed Chalkboard Sign.

Behold.


Thursday, August 22, 2013

And now for a little comic relief...

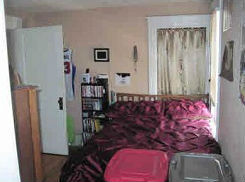
The dining room breaks off in two directions; one being what we call our home office these days.  Back then it was my sister's temporary bedroom.  So stylish.

BEFORE:
image

Wednesday, August 21, 2013

"Tonight, we dine in hell..."

Well, we used to.  It's looking a bit more heavenly these days.
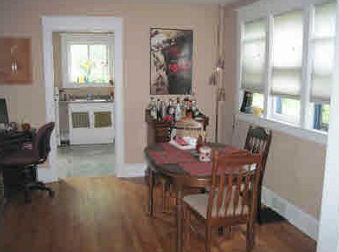
The kitchen opens up into the dining room.  You'll start noticing from here on that each room was just painted a slightly different shade of skin...yum.
BEFORE:


image

House Tour

So, it has occurred to me that there have been a whole lot of changes in my house since it has become my home.  I thought it might be fun to take you guys on a little house tour, show ya around, a little 'before-and-after' action...

I'm going to dedicate one post to each individual room so that I don't have one enormous post of mega pic overload.  The before pictures are mainly pulled from a PDF of an appraisal that we had done.  They aren't high quality, but they get the point across.  They pretty well capture what the house looked like at the time we purchased it.  (A disheveled frat den.)
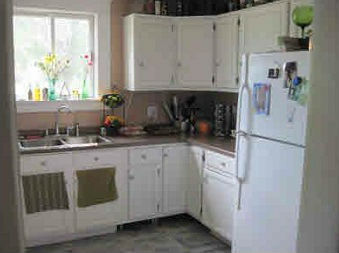
Let's start off with the kitchen!  Just lovely, huh?  Plain, at best.  The only thing you really wanna look at are my beautiful flowers in the window.  Oh, and don't you just love Shaun's hand at decorating?  You can barely see them, but there are empty wine bottles lining the entire top of the cupboards.  Keepin' it classy.

BEFORE:
image

Monday, August 19, 2013

Greetings, Fellow DIY-ers

It's time to get serious!  I started using my Tumblr account more and more as an actual blog until somebody was all like, "Hey, why don't you write a real blog?"  So here I am!  I don't have a lot of insanely interesting hobbies, but I do love to DIY anything and everything.  I am interested in all things home decor, organizational, and do it yourself (and for cheap.)  This blog is my outlet to share my ideas and creations.  I want to get feedback and connect with other people who share my interest in all things afford-ably glamorous.  There's always room for improvement and I'm here to show mine off.


If I show you mine, will you show me yours?  *Wiggles eyebrows*


Oh god, scratch that.  I have a feeling I'm just going to end up saying a lot of embarrassingly corny things. 


 Bear with me and ENJOY!


You might also like:

Related Posts Plugin for WordPress, Blogger...