
Not only am I a total control freak, but I also try to take the eco-friendly route when possible. That's me, folks; savin' the world while settin' the mood.
I've been wanting to tackle a little electrical project ever since refurbishing my chandelier. Having the bulbs right out there can make for some harsh lighting at times. I love a good dimmable light.
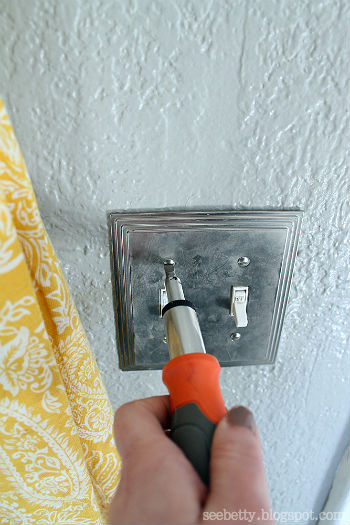
Here's what my switch plate situation used to look like:

(Please ignore finger smudges galore.)
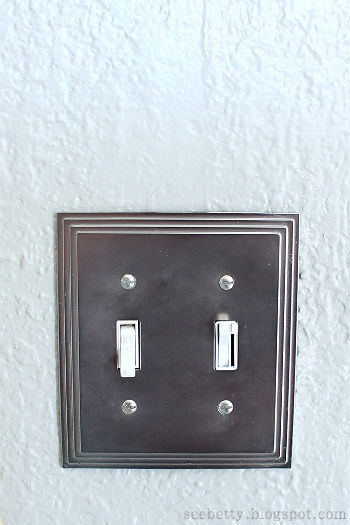
The switch on the left controls the kitchen lights. I wanted to keep this switch the same, but swap out the dining room one on the right for a dimmable option.
Enter Lutron Eco-Dim:

I picked this switch up at Home Depot for about $15. There were many options so I'll tell you why I went with this one.
- I want all of the switches in my house to match. It would be kinda weird if there was just one that didn't fit in with the rest; and all of them are toggles.
- If not for reason number 1, I still have the kitchen light switch to think about. If I went for a different look for one, I would have to change both.
- Then there would be the whole buying a new switch plate deal.
- It was cheaper than a lot of the other looks. ...And I'm cheap.
As you can see on the package, this one can be used with both a single pole or 3-way. My chandelier is a single pole because it only has one light switch. If it had two switches (sometimes a light has a switch at both ends of a room) it would be a 3-way. This is something you'll want to keep in mind when shopping for a dimmer because not all of them work with both kinds.
Another thing that you'll want to figure out before purchasing is whether or not you have the right kind of light bulbs. The bulbs I already had were energy efficient, but these do not work on a dimmer.
This is one of the old bulbs:
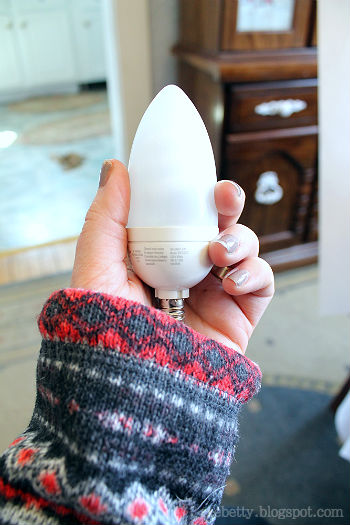
They do make dimmable energy efficient bulbs so pay attention to your packaging and be sure you're getting the right ones.
These are what I got to replace my old bulbs:
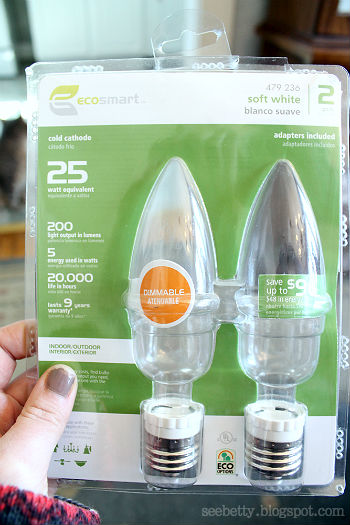
They cost $45 for 6 bulbs, but it wasn't too painful considering the previous ones had come with the chandelier (which I paid $4 total for...BONUS) and the new bulbs included adapters that let them fit into any light that a regular size bulb would. So I can screw those onto the old bulbs and use them wherever!
Now I feel like I've done a lot of blabbing already, but first thing's first...
TURN OFF THE ELECTRICITY BEFORE YOU START!
Please don't forget that very important step. That would suck. Go down to the breaker box and cut off the electricity to your switch, or you can do what I do and cut off the electricity to the whole house because you're extra paranoid.
Then I removed the filthy switch plate and the switch on the right side only.
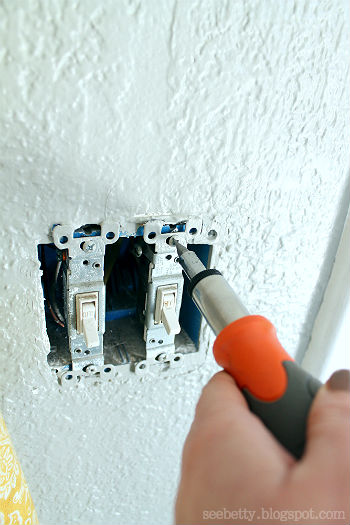
I easily detached the wires by loosening the screws that hold them down to the sides of the switch.
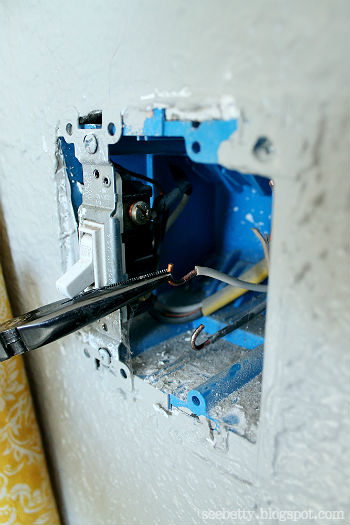
After that I simply reattached them to the new dimmer switch in the same spots and tightened the screws to hold the wires in place. Here mine are in the pictures below. The green screw on the top is for the copper ground wire.
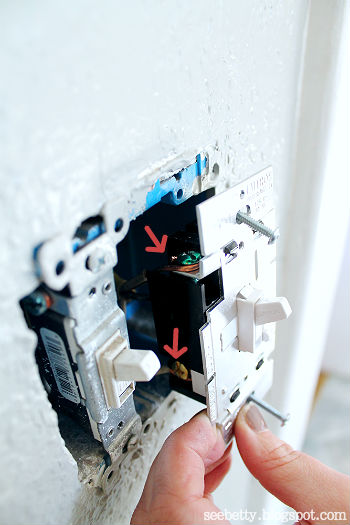

I shoved the switch back into the wall and secured it with the top and bottom screws. Then I headed down to the basement to flip the power back on. I wanted to test my handiwork before I had it completely put back together.
Put the switch plate back on and that's all there is to it!

How about a few action shots??
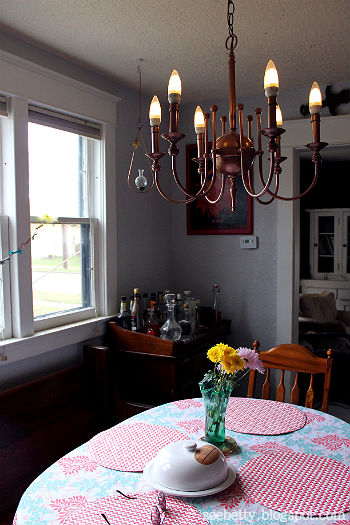
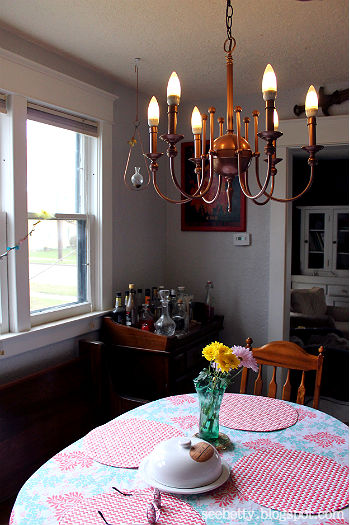
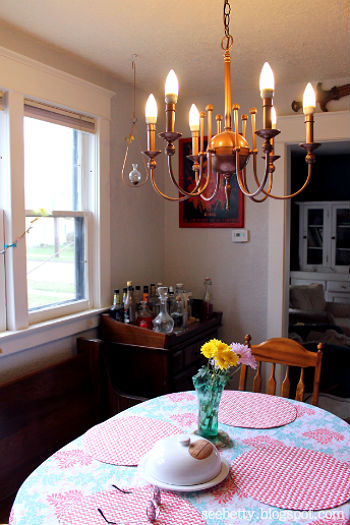
I've been wanting to be able to dim these lights down for SO LONG! Now that I know how simple it is, I can't believe I didn't tackle this little project sooner.
Do you have any rooms that you'll be adding some mood lighting to?

No comments:
Post a Comment